Beginners Digital Photography: Week 3

I’m taking a beginners digital photography class at Lill Street Art Center. The entire class is about learning to photograph in Manual Mode. I’ve decided to document my weekly notes from class along with the assignments so I’ll have a point of reference when this is all over. I also hope that this shared knowledge will inspire other rookie photographers! Click here for Week 1 & Week 2 notes.
Class Notes
When you take a picture, you really are capturing a moment in time. Photography has the ability to capture time in a way that the naked eye cannot. By definition, the shutter speed of your camera is the length of time a camera's shutter is open when taking a photograph (also called the exposure time). Shutter speeds are expressed in the form of seconds (or fractions of a second).
I found this chart, which clearly shows a range of slow to fast shutter speeds, and when it would be a good idea to switch to a tripod.

Don't let the fractions confuse you. Keep in mind that 1/10 of a second is a much longer amount of time than 1/100 of a second. (Isn't math fun?)
We talked a little bit about shutter speed during Week 1.
- Fast shutter speeds freeze moving objects. Slow shutter speeds create motion blur.
- Fast shutter speeds let in less light and produce a darker image. Slow shutter speeds let in more light and produce a brighter image.
It's a good idea to use a tripod when using a shutter speed slower than 1/60, because you want to keep the camera as still as possible to get the sharpest image.
In the chart above you might be wondering what "Bulb" is. Bulb is the lowest shutter speed setting allowed on your camera. It allows you to control the shutter speed and make it what you want. You can hold the shutter release button down for as long as you want the shutter open.
Assignment
Our assignment for the week was to explore motion and time with our cameras using both slow and fast shutter speeds. We were told not to worry too much about our ISO or aperture (all three work together to control the exposure level).
My Photos

Shutter Speed: 1/30
^^^ panning with the car, keeping the car mostly in focus with a blurred background ^^^

Shutter Speed: 1/5

Shutter Speed: 1/30
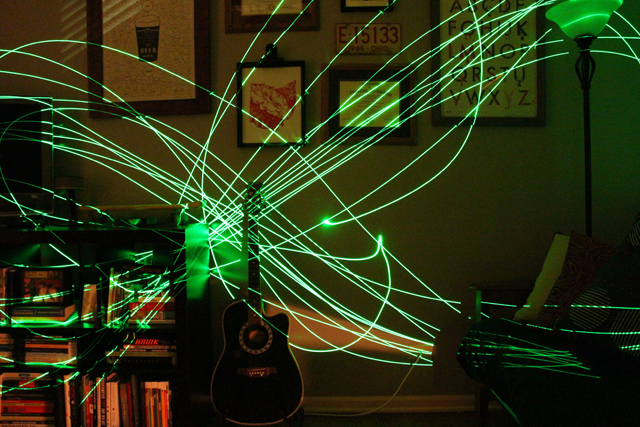
Shutter Speed: 10
^^^ using Bulb, a laser pointer, & holding the button for 10 seconds ^^^

Shutter Speed: 1/320

Shutter Speed: 1/1600
^^^ I borrowed this idea from a girl in class ^^^

Shutter Speed: 1/250
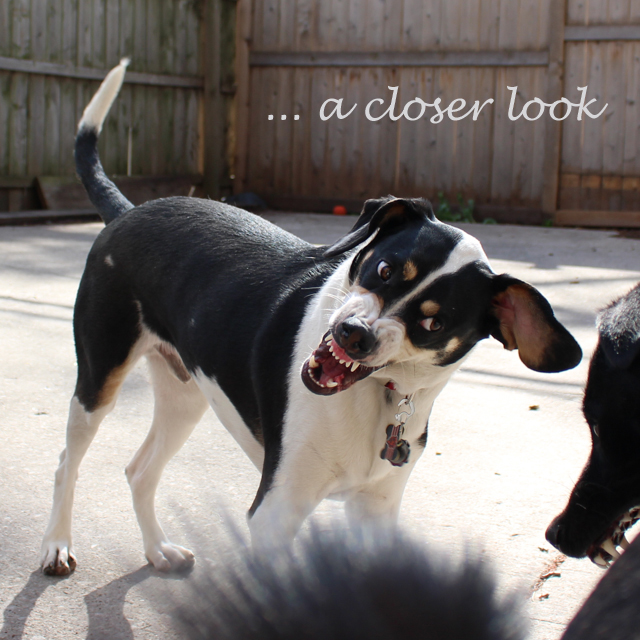
^^^ I didn't know this gentle creature had it in him! ^^^
I realized while writing this post that it can be difficult to understand how our images change as the shutter speed changes. I think most people understand that a fast shutter speed freezes motion, but I think the slower shutter speeds can be confusing. I decided to take a picture of my ceiling fan starting with a slow shutter speed and gradually cranking it up. I didn't change the ISO or aperture. As you can see, the slower the shutter speed, the more light that is let in, and the brighter the image.

I hope this was helpful in explaining what shutter speed is and how it works. Keep in mind that as you adjust your shutter speed, you are either letting in more or less light - which means that you need to adjust your ISO and/or aperture to get a properly exposed photo. Some of my photos above are not properly exposed, because I was simply experimenting. Just remember that to get a properly exposed photo, you want the exposure indicator needle to land on 0 (in the middle), as explained in Week 1.